Showing posts with label making. Show all posts

Happy New Year!

As we open the door to 2013, I thought I might look back on some of the final moments of 2012.

I photographed my mantle the Friday before Christmas - as promised - but never posted them because I was busy doing last minute holiday preparations. Better late than never, eh?

On the left side of the mantle I have a vintage(?) tree candle that I've used in years past, two cone trees I made this year, and a crystal jar full of Andes mints. It's not Christmas without those little chocolates. For a tree-making how-to, check out the bottom of the post!


On the right side of the mantle I have an all-white nutcracker I picked up at Home Goods, a gray sweater cone tree from Target (though I think you could easily DIY this with a craft cone, an old sweater and some sewing know-how), another vintage christmas candle and a folded paper Christmas tree I made. I was so excited thinking I had stumbled on a new craft idea until my mom told me my great-grandmother used to make these a looooong time ago. I was a little bummed she burst my bubble, but I'm glad to have something else in common with my late Granny. Again, see the tutorial at the bottom. Several of the mantle trees are elevated by Blomster candle sticks from Ikea. They're designed to hold pillar candles, but if you turn them upside down the flared bases make perfect little display platforms. I only recently added them to the mantle, but they're going to stick around even after the holidays.


The center of the mantle has some little tea lights and a rolled paper wall hanging - have I showed this to you yet? I'm thinking not - that both live there year round, with the addition of all the incoming Christmas cards and the brown paper wreath I made last year. Admittedly it was too small for the space when I made it, but I was making do with what I could get on the cheap. This year I like the idea of floating it in front of the wall hanging to fill up space but still add a bit of holiday cheer. I'm not a slave to the idea that Christmas has to be an explosion of red and green, so I'm just fine with a neutral mantle with a hint of color on the wall.


The last home item we added in preparation for Christmas was Luke's new tire swing! We installed it the day before Christmas - thank goodness for oblivious toddlers because you could clearly see this through the kitchen windows - and unveiled in Christmas morning as a gift from Santa. I would have loved to taken the credit on this one, but it's hard to wrap a whole tree so all the glory goes to the big guy in red. Here you can see the hubby testing it out to make sure the tree branch would hold the weight. So far, so good.


After the chaos of gift-opening had settled some of the "grown-ups" borrowed Luke's new remote controlled robot cars and created our own version of battle bots, with a taped off arena and everything. We called it Robot Slap Fight. It was awesome.


On New Year's Eve Luke's shaggy hair was getting to me so I gave him a haircut. I intended to just give him a trim, but things got a little tricky on the crown of his head so I gave up and buzzed it all. He always looks so grown up with short hair! After I was finished he said "Thank you Mommy. My hair's all better now!" Could he get any cuter?


Shortly after his haircut (and post-haircut bath) hubby and I left him in the capable hands of our family and headed to Greensboro to ring in the New Year with the Avett Brothers - my favorite band and the namesake of this blog. Here are some (terrible) photos as proof:


Since it was New Year's the coliseum was prepared with nets of balloons and confetti cannons to go off at midnight!

As if confetti and balloons weren't enough, those of us in the back of the arena got a special treat. Halfway through the show the band came over to a small stage right in front of us and played a mini-set for us. It was like I was back in college, seeing them in a tiny venue again!


Also, after all these years, I FINALLY bought an Avett Brothers t-shirt. I typically don't buy concert/band shirts when I'm at shows but then I always regret it once I get home. Not this time! Plus, I now have a new shirt-buying strategy for concerts: go to the merch booth as soon as the band leaves the stage after the regular set. While everyone else is clapping and screaming for the encore, you can rush right over to the merchandise and walk right up, no wait! Then you're back in your seat in time for the encore. Alas I can't take any credit for this, the idea was all my hubby's.

image source

So that's how I finished off 2012. I still have lots of Christmas goodies to eat so the holidays are going to last me well into the new year. How did you ring in 2013?

Without further ado, here are the tree tutorials...

-----------------------

Brown Cone Tree
time: 1-2 hours, depending on how thoroughly you glue
cost: $10 or less
supplies:
- craft cone
- jute, or other thick twine
- hot glue gun, several glue sticks
- scissors
directions:
- starting at the bottom, wrap cone with jute and glue as often as needed - I glued pretty much the whole thing
- that's it, you're done

White Cone Tree:
time: 2-3 hours
cost: $10 or less
supplies:
- craft cone (or make your own out of cardstock)
- crepe paper streamer
- silver sharpie, or whatever accent color you choose
- tape/glue
- scissors
directions:
- based on the height of your cone and the width of your streamer, mark where you want each layer to "sit" on the cone
- color a 1/2 inch accent band along the bottom of the streamer - the sloppier the better
- starting at the bottom, wrap the streamer (loosely) until it goes around the cone 3 times - cut streamer
- cut slits in the streamer, starting from the bottom, roughly 2/3 the way up - again, sloppy is fine
- wrap the streamer around the cone 3 times and tape/glue to secure
- repeat steps 2-5 for each layer until the cone is covered
- NOTE: be sure to line up streamer seams in the back of the cone - no one will see that part, so keep the front looking neat

Folded Paper Tree
time: 2-3 hours
cost: free, unless you have to buy a magazine
supplies:
- magazine (I used an issue of Architectural Record, but something hefty like Cosmo or National Geographic is perfect - People or US Weekly would be too puny)
- bone folder (optional)
directions:
- I used this post by Homemade Mamas and it's pretty simple. They link to a separate video tutorial, but I didn't feel the need to watch it.
- just fold, fold, fold!

Halloween Craftiness

Halloween night may be long gone, but the candy is holding out which means I'm still allowed to talk about Halloween. So there.

A few weekends ago the hubby and I took Luke out to pick our pumpkins. We settled on a massive specimen that was almost 2 feet tall and Luke had some fun digging it out and then sitting in it.

Being the tried and true Wolfpack fans that we are, we decided to carve a howling wolf into our pumpkin. Since our pumpkin was so big - meaning it had super thick walls - we had to buy a jigsaw just to carve it. Not that the hubby was complaining. The man loves his power tools.


To go with the wolf theme I made some scary eyes for our bushes using empty toilet paper rolls and some glow sticks - inspired by this pin. Although I did modify it a little bit. I cut a rectangular hole in my tp roll, cut the eye shapes into card stock, then taped the card stock onto the tp roll to cover the hole. This way I could have a little more detail since it's hard to make controlled cuts on a tube. I got a multi-pack of glow sticks, popped em in and covered the ends with duct tape. And voila, pinplementation!


What did you do for Halloween?

P.S. Wanna see Luke's Halloween costume? Head over to the Peanut Stand to find out!

Snippets of Creativity

By now you probably know that I can fill some downtime at work by making some opensource.com images. Well, I'm back at it!

I made this money web layout for our open source: finance page.


I put together this against the current image for general use.


I also created a text-free version to make it more versatile.


That's all, folks!

Tonight's the Night to Fake It

Or tomorrow night, whenever you get around to it. Of course, by "fake it" I mean use Photoshop to make something awesome that only looks like you spent hours meticulously writing with chalk.


My mom found this quote and asked me to lay it out and print it for her. She wants to put it in her office because she has difficulty telling people no at work. Or ever.

At first I was just going to pick a pretty font and be done with it but when I found this tutorial by Foolish Fire on how to fake a chalkboard effect I knew I had to try it. I will leave the Photoshop instructions to her, but my basic process was this:

1) I laid out my text in Illustrator. I used a variety of different fonts to create the composition you see above.

2) I printed my file and traced everything onto white trace paper. To add to the chalky texture I used a pencil (both HB and 2B, for you art supply nerds) instead of pen and added dashes and fills to give extra differentiation to the fonts.

During this step I also gave some extra personality to a few parts. The "but" didn't have the curled line work so I free handed it. The "please everybody" didn't curve like that so I tweaked each letter by hand. I just drew a curved guide-line in Illustrator so I knew where each letter would need to extend to.

3) I scanned the hand-drawn artwork and made some adjustments in Photoshop, following the tutorial. If you're comfortable with Photoshop this is a simple process, but if you're just learning it's probably a little more difficult. Either way you really do need full Photoshop for this, a simpler photo editing software won't cut it.

So that's it! I just need to print this bad boy and pop it in a frame then I will have some free and (mostly) easy art for my mom. What have you made lately?

P.S. - If you like the artwork feel free to download it for yourself! It is sized to an 8x10 but you could scale it down if you'd like it smaller. Leave me a comment telling me where you plan to hang it, and please don't use it for commercial purposes. Thanks!

Techaleidoscope

What is a techaleidoscope? It's a kaleidoscope filled with technology. It's also a word I made up. 20 Internet points to me!

As I mentioned previously, whenever I have a little downtime at work I can get the creative juices flowing by making a graphic for open source. The concept behind this one had been stewing for a while and I finally found some time to commit it to paper pixels. It's easy enough: draw some techie stuff, crop it inside a triangle, mirror it around a few times and... BAM! Techaleidoscope!


The official open source template calls for a rectangular output, but I couldn't help making a round one as well to show off the full kaleidoscope effect.


Bonus for all the nerds in the house: the binary in the background translates to "open source is not limited to software." It's a true statement but it also just happens to be the title of an article that you can read on open source at this very moment. What are you waiting for? Go read! But then come back here and tell me how awesome I am.

Another Year, Another Fantasy Team

Don't get me wrong, I legitimately love playing fantasy football. But, just as much, I love that it gives me an excuse to make ridiculous stuff in Photoshop. Several years ago I helped create logos for all the teams of the hubby's very serious, very competitive league. This included my team the Bloomer Crickets.
Last year I played in a (mostly) ladies-only league, but I stuck with my original name and logo. This year I'm playing in a league that the hubby started with his work friends. For those keeping track he's playing in 2 leagues yet again. Since the other team owners are people that don't know me very well (or at all) he strongly suggested I retire my old team name and pick a new one. I was a little disappointed - that name still cracks me up for reasons even I don't understand - but I got over it when I realized I had the chance to come up with another name and logo.

The new team is named Bait 'N Tackle because, well, I love puns. My logo is a football player tackling a giant trout because I still love puns.

What do you think?

I Love My Job

Seriously, it's freakin awesome. I know I've only been there a short while but the perks keep piling up.

Perk of the Day: opensource.com. What does that mean to you? Probably nothing. What does it mean to me? It means I get to make my own little photoshop creations whenever I have a bit of downtime.

Here's a few details: Red Hat provides open source software. The company is so supportive of the open source method they preach the idea that open source can work for lots of different processes, in a variety of fields. So they sponsor the Open Source website and provide graphic images (licensed in Creative Commons, of course) for the article writers and anybody else that wants to use them. It's great stuff, but that's not what I'm here to talk about. I'd rather show you what I made.


Just a little graphic of ants marching along, carrying a stick together. For those that don't get subtlety, collaboration and sharing make awesome things happen. Meaning "Yay open source!" We're allowed to design whatever we want, but really the point is to provide images for the website.


I also made one, sans dirt, for the purists out there.

If that's not enough pants-wetting job awesomeness for you, how about this:

That's the cow drawing I contributed for our Cow-laboration project. What is a cow-laboration project? I have no idea, I just wanted to draw a cow. See more awesome cow contributions here.

Jealous yet?

A Gift For Penny

 A few weeks ago I got to go a baby shower for two of my favorite girls: my twin soul Brettany and her soon-to-be-born daughter (and Luke's future girlfriend) Penny.


I'm a fan of practical baby gifts so I gave her a whole box full of useful, been-there-done-that stuff to get her through the newborn phase. However, I couldn't keep my crafty side at bay - nor could I resist the urge to make something personal for Penny's nursery - so I made a little initial block that was very similar to some art I made for Luke's nursery a few months years ago. God, has it been that long?


True to form, I made it using stuff I had lying around the house. The "canvas" is a wood scrap I found in the workshop. The patterned layer is stripes drawn onto tracing paper with markers and the top layer - which creates the outline for the 'P' - is a piece of white cardstock. I chose shades of lavender and pink to match Penny's nursery.


Don't you just love projects that are as simple as they are cute?


Handmade Holiday Wreath


Yesterday I showed you the wreath I made to go over my holiday mantle-scape.


Now I'm back to show you how I put it together. I knew I wanted to use some brown craft paper I had leftover from an old project, so I headed to Pinterest in search of paper wreath tutorials. Holy cow, are there a lot of them out there! After sifting (and sifting, and sifting) I finally found my inspiration:


Now that I had my inspiration, I set out to scour thrift stores for the cheapest possible materials. Some people go the obvious route and buy a wreath form when they make a wreath, but - hello? - those things are expensive! Not me, I looked high and low for anything that was round, lightweight and cheap. The winner:


... this wicker basket, charger thing. I'll give 1000 bonus points to anyone who knows what that basket thing actually is. My favorite part? The 99 cent price tag.


"But wait," you're surely thinking, "who wants a wreath with a basket-weave center?"

Nobody, that's who. Luckily for me the basket oddity was constructed from 2 main parts so the basket-weave middle could be separated from the wicker band with just a few dozen pries with my flat head screwdriver.


In the end I was left with this round, lightweight yet oddly-asymmetrical (which I didn't even notice until I got the middle out) base on which to construct my wreath. Ta-da!

This is the part where you're all impressed.

Not as impressive is the fact that the edge of the basket was a wee bit broken. I wrapped the joint with tape to stabilize it and keep it from breaking further and called it a day. I knew the fullness of the leaves would hide my patch job entirely.


My inspiration didn't provide much of a tutorial, she only mentioned how long it took her to glue all of those little paper leaves. I made the executive decision to simplify my life by using fewer, bigger paper leaves. Most tutorials I read included making a cardboard template to trace so that all the leaves would be the same size. I did not do this because A) who has time for that? and B) who cares if all the leaves are identical? The answer to both A and B is not me. So my method was this:

-Start with several sheets of craft paper that are 22" x 32".
-Meticulously cut the sheet into 6 even strips using a ruler, a pencil and an x-acto blade.
-Realize that you're wasting your time and that speed is key. Also realize that paying close attention to your task is distracting you from the finer plot points on Glee.
-Haphazardly cut strips of craft paper that are roughly 5" x 22".
-Shoddily cut strips into 8 similar but not-at-all equally sized rectangles.
-Fold (but don't crease) each rectangle in half, lengthwise.
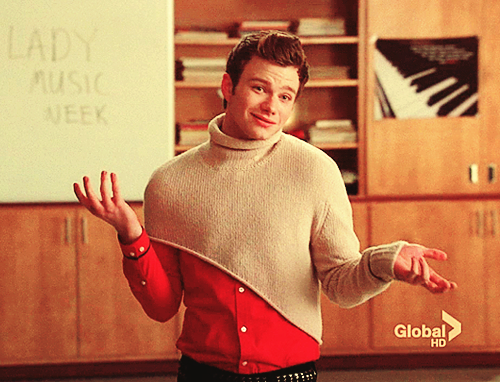
-Think to yourself that the someone in charge must be smoking crack because no teenage boy, gay or not, would wear Kurt's ridiculous half-sweater.

Where do you even BUY a sweater as dumb as this? It's a partial sweater, with a TURTLENECK!
image source
Also, this is stupid, too.

-Cut an arc along the open side of each folded rectangle, creating a symmetrical leaf shape.
-Using a glue gun, attach leaves to the wreath base in neat rows to assure even coverage.
-Panic because the coverage is NOT even and just start stuffing extra leaves everywhere until the wreath is finished, or until you burn yourself with your glue gun, whichever happens first.

I never kept an official count, but I think I used somewhere between 75 and 90 leaves. It is important to note that the fold in each leaf serves two important functions: it allows you to make symmetrical, non-wonky, leaves quickly AND it gives the wreath lots of depth and shadow once you're done. No one wants to look at a flat, dull wreath. And I mean no one.


You could do this with a number of different papers - patterned scrapbook paper, wrapping paper, book pages, black and white photos, whatever butters your toast - to change up the look. However, I would recommend a fairly stiff paper if you want fullness without having to make a zillion leaves.


You likey? Stay tuned for yet more Christmas goodies tomorrow. More than one post in a week? Who am I and where is the writer of this blog?

A Shameless Request for Votes

Hey guys, remember me? Probably not because I'm a terrible blogger. My days have been filled with applying for jobs and forcing a toddler to eat his vegetables - which is thrilling, trust me - but it isn't exactly blog fodder. I have some Christmas posts coming your way, but in the mean time let's talk about my harrier better half.

When my hubby isn't busy being an architect or spawning adorable babies he likes to invent things. Not in the kooky guy with gears and springs way, but in the awesome build stuff in our wood shed way.

not pictured: my hot hubby

He is also just a bit obsessed with playing video games and being no more than 3 feet away from his iPad at any time. So he came up with a nifty device that will allow him to ignore me while doing both of those things simultaneously.

graphic by my hubby, who is more awesome than yours

"iPad games are limited by the touch screen. The lack of tactile response and poor ergonomics makes some games (i.e. first person shooters) annoying after a few minutes of game play. By creating a case and controller combo that connects to the Ipad port this will allow game developers to create games like Call of Duty for the Ipad and get the same experience as an x-box. By concentrating on the ergonomics of the handle, players can play for hours without their hands cramping. The ICade is a similar product that solves a problem for retro-style arcade games. This concept is trying to do the same for more modern games."

To spread the word he posted his idea to Quirky, a website that helps form introductions between developers and inventors. If you think his idea is nifty, too, click here to view his idea page and then vote for him! You get 1,000 bonus points if you share the link on twitter/on facebook/on your blog/via skywriting. Or if you're a bazillionaire who loves to invest money in awesome ideas, email me and I'll be happy to relieve you of some of your money.

Well, That Was a Piss Poor Idea

I don't just put curse words in my blog titles because I love cursing. Which I do - it's fun for all ages! In this case the swear word in question is relevant to the topic at hand: pee. Cat pee, to be specific.

Remember when the hubby and I thought really, really hard about the best possible way to keep stray litter and that ever-so-pleasant litter box smell from overwhelming our house? Our solution was a cheap DIY project that solved all of our problems and then some.


Or so we thought. What we actually accomplished was a connected series of litter boxes. Who loves hiding their pee in tiny, cave-like places? Cats do! The fact that we didn't realize this sooner is hugely embarrassing.


Not long after we installed the litter box we discovered one or both of them were peeing in the vanity, right in front of the litter box. We couldn't figure out how to stop them, but we put down a plastic mat to protect the vanity cabinet. You see, my lovely husband has a stubborn streak and instead of giving up on the idea, he was GOING TO MAKE IT WORK, DAMMIT. So we forged ahead, determined to salvage the seemingly-awesome hidden litter box idea.

While cleaning the litter box last night the hubby noticed the smell was much worse than usual. Come to find out, the reason it smelled so bad - SO, SO BAD - was because the cats had also been peeing in the linen closet and the pee had SOAKED INTO OUR WOOD FLOORS. Which we now get to rip out and replace with something water-repellant pee-resistant. Just typing that makes me feel gross. The whole time he was cleaning up he kept muttering under his breath. I couldn't hear all of it, but what I could catch made a compelling argument that our next pet should be a dog.

As an added bonus, the linen closet got a complete organizational overhaul. Apparently the smell of cat urine is so strong that it permeates everything around it. In this case, in was wafting up the linen closet and made all my clean linens and towels smell like piss. So everything had to be removed, washed, folded and moved to another location. Now the no-longer-aptly-named linen closet only holds paper towels, toilet tissue, first aid supplies and other things that nobody will put their face on.

The current plan is to leave the cat door into the linen closet, block the tunnel between the closet and the vanity and place a plain litter tray on the floor of the closet. It will still contain the smell (somewhat) and the litter (somewhat) but at least they'll stop pissing on my damn floors. But yeah, cats are still awesome. Adopt a kitten today!

Finally, A Project That Doesn't Involve Trash

But it does involve free stuff.

Let's talk about my new bag. It was posted on Freecycle and described as "military style, but not camo, messenger bag." I can always use an extra bag or two and it was free so I figured "why not."

As soon as I picked it up I was pleasantly surprised to see that it was in good shape and not ugly - always a risk when someone gives something away for free. It's definitely on the military/utilitarian end of the style spectrum but that suits me fine for a day-to-day, not-going-out-for-drinks bag. As you can see it has a handle so that it can be carried like a briefcase.


It also has this handy wrap zipper thing going on so that you can keep it slim...


... or open the zipper and make it nice and roomy. I am all about organizational flexibility.


I kept thinking "Who wouldn't want this bag? Why was this free?" My answer came when I discovered that the clips for the detachable strap were missing. The previous owner had "solved" this by tying the strap to the bag with some sad little rusted wire. That just won't do. Luckily I know my way around a hardware store* so this would be an easy fix.
*That sounds dirty, doesn't it?


All I had to do was buy some new clips so that my strap, now freed from it's wire shackles, could be clipped to the sides for a messenger bag...


... or to the back to get some backpack action going on. Oh, and it's also missing a D-ring delta ring whatever that metal triangle is called. I can fix that too.


My original plan was just to replace the one missing triangle, but I couldn't find them anywhere. So I bought 6 old school D-rings (for 55 cents each) and replaced them all.


Let me tell you, that part was not fun. It wasn't impossible but it required almost more strength than my dainty little hands could muster. But I did it. Bonus: I got to play with 2 SETS OF CALIPERS. AT ONCE. Go me.

I also bought 2 new clip rings to replace whatever used to hold the strap to the bag. I didn't intend to buy something quite so bulky, but I also didn't want to drive to every hardware store in town so I bought the best option Lowe's had to offer.


You may notice the tag is still on that clip. That is because when I got home I found 2 of these guys that have a smaller profile and look less obtrusive, so the other ones are going back to the store.


After I got all my hardware replaced and my bag hung up to photograph, I saw one last adjustment that needed to be made. Can you spot it?


If you guessed the floppy strap, you win 10,000 gold stars.* I photographed the bag with one side as it was and one side fixed so you can see the difference.
*Gold stars not redeemable for cash, design services or anything of value.

And, just for fun, here's a shot with both sides fixed. Ahh, much better.


I guess the only thing I haven't talked about is what I plan to use the bag for. It's a little too rugged for me to use as a purse, but it makes a perfect laptop bag. The main pocket holds my neoprene laptop sleeve. The right front pocket is the perfect size for thumb drives, camera cords, etc and the left pocket holds the strap when I'm not using it.


What do you think? Not bad for a $3.30 bag, right?
Blog Widget by LinkWithin